Microstack Installation on Windows 11
in blog on Microstack, Openstack, Multipass
Installation
Chocolatey (choco) 설치
- Run the following command from the command line or from PowerShell
Get-ExecutionPolicy
(Restricted가 아닐 경우)  Set-ExecutionPolicy AllSigned 실행 후 Y 입력
Set-ExecutionPolicy Bypass -Scope Process -Force; [System.Net.ServicePointManager]::SecurityProtocol = [System.Net.ServicePointManager]::SecurityProtocol -bor 3072; iex ((New-Object System.Net.WebClient).DownloadString('https://community.chocolatey.org/install.ps1'))
choco

Chocolatey v2.3.0
Please run 'choco -?' or 'choco <command> -?' for help menu.
- Windows Home 에디션으로 Hyper-V 비활성
- Hyper-V.zip 다운로드/압축해제 후 관리자권한으로 실행
- Download Multipass for Windows
- Default 로컬드라이버인 VirtualBox를 Hyper-V로 변경
multipass set local.driver=hyperv
Multipass 설치
choco install multipass
Microk8s Installation
- SSH Key Creation (at windows powershell or command terminal)
ssh-keygen -C ubuntu -f multipass-ssh-key
touch cloud-init.yaml
- code(editor) cloud-init.yaml
users:
  - default
  - name: vmuser
    sudo: ALL=(ALL) NOPASSWD:ALL
    ssh_authorized_keys:
    - <content of YOUR public key>
- Ubuntu VM Creation w/ multipass (Using Hyper-V; Windows Hypervisor)
multipass launch --name microk8s --cpus 4 --memory 8G --disk 30G jammy --cloud-init cloud-init.yaml
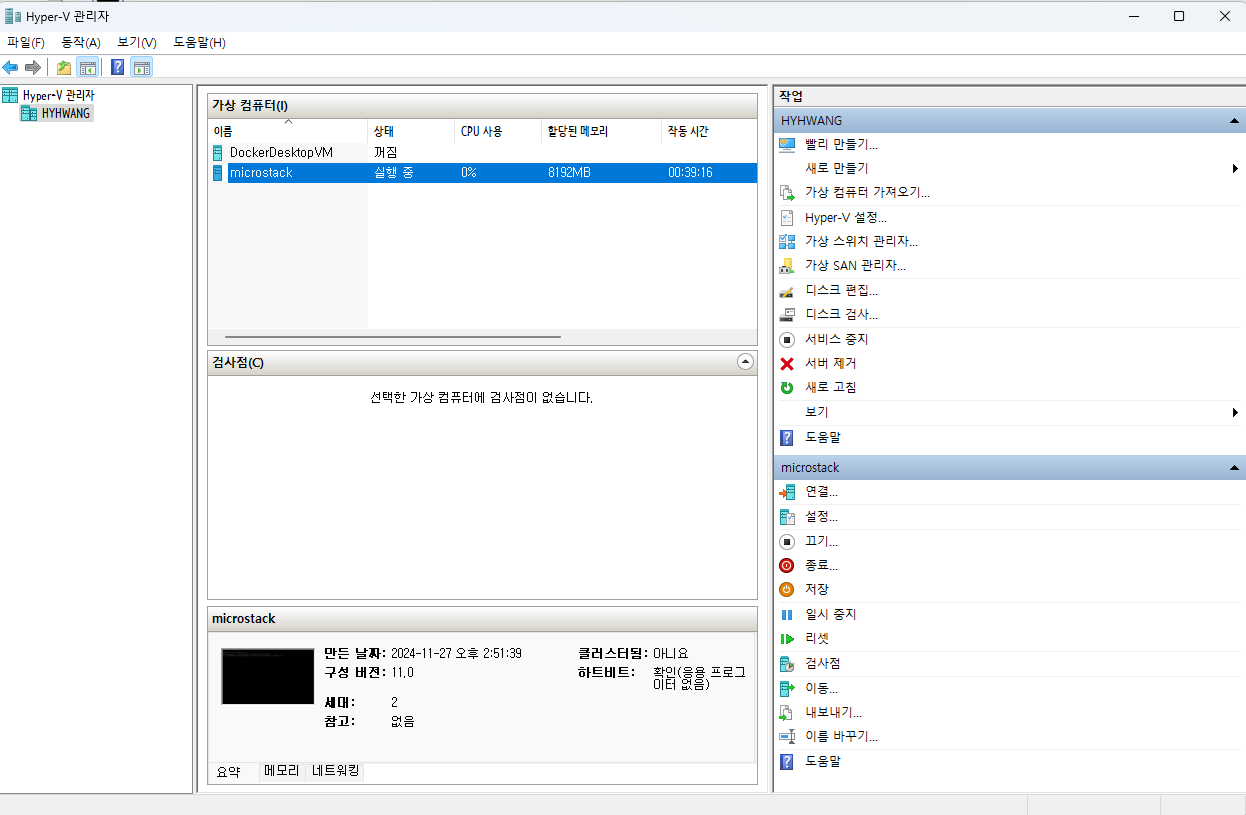
- Hyper-V 관리자

- Login to Ubuntu VM
multipass shell microk8s
- Microk8s Installation (at Ubuntu VM)
mudo snap install microk8s --classic
- Microk8s Initialization
sudo microk8s status --wait-ready

microk8s is running
high-availability: no
  datastore master nodes: 127.0.0.1:19001
  datastore standby nodes: none
addons:
  enabled:
    dns                  # (core) CoreDNS
    ha-cluster           # (core) Configure high availability on the current node
    helm                 # (core) Helm - the package manager for Kubernetes
    helm3                # (core) Helm 3 - the package manager for Kubernetes
  disabled:
    cert-manager         # (core) Cloud native certificate management
    cis-hardening        # (core) Apply CIS K8s hardening
    community            # (core) The community addons repository
    dashboard            # (core) The Kubernetes dashboard
    gpu                  # (core) Alias to nvidia add-on
    host-access          # (core) Allow Pods connecting to Host services smoothly
    hostpath-storage     # (core) Storage class; allocates storage from host directory
    ingress              # (core) Ingress controller for external access
    kube-ovn             # (core) An advanced network fabric for Kubernetes
    mayastor             # (core) OpenEBS MayaStor
    metallb              # (core) Loadbalancer for your Kubernetes cluster
    metrics-server       # (core) K8s Metrics Server for API access to service metrics
    minio                # (core) MinIO object storage
    nvidia               # (core) NVIDIA hardware (GPU and network) support
    observability        # (core) A lightweight observability stack for logs, traces and metrics
    prometheus           # (core) Prometheus operator for monitoring and logging
    rbac                 # (core) Role-Based Access Control for authorisation
    registry             # (core) Private image registry exposed on localhost:32000
    rook-ceph            # (core) Distributed Ceph storage using Rook
    storage              # (core) Alias to hostpath-storage add-on, deprecated
sudo microk8s enable dns

Infer repository core for addon dns
Addon core/dns is already enabled
sudo microk8s enable storage

Infer repository core for addon storage
DEPRECATION WARNING: 'storage' is deprecated and will soon be removed. Please use 'hostpath-storage' instead.

Infer repository core for addon hostpath-storage
Enabling default storage class.
WARNING: Hostpath storage is not suitable for production environments.
         A hostpath volume can grow beyond the size limit set in the volume claim manifest.

deployment.apps/hostpath-provisioner created
storageclass.storage.k8s.io/microk8s-hostpath created
serviceaccount/microk8s-hostpath created
clusterrole.rbac.authorization.k8s.io/microk8s-hostpath created
clusterrolebinding.rbac.authorization.k8s.io/microk8s-hostpath created
Storage will be available soon.
sudo microk8s enable dashboard

Infer repository core for addon dashboard
Enabling Kubernetes Dashboard
Infer repository core for addon metrics-server
Enabling Metrics-Server
serviceaccount/metrics-server created
clusterrole.rbac.authorization.k8s.io/system:aggregated-metrics-reader created
clusterrole.rbac.authorization.k8s.io/system:metrics-server created
rolebinding.rbac.authorization.k8s.io/metrics-server-auth-reader created
clusterrolebinding.rbac.authorization.k8s.io/metrics-server:system:auth-delegator created
clusterrolebinding.rbac.authorization.k8s.io/system:metrics-server created
service/metrics-server created
deployment.apps/metrics-server created
apiservice.apiregistration.k8s.io/v1beta1.metrics.k8s.io created
clusterrolebinding.rbac.authorization.k8s.io/microk8s-admin created
Metrics-Server is enabled
Applying manifest
serviceaccount/kubernetes-dashboard created
service/kubernetes-dashboard created
secret/kubernetes-dashboard-certs created
secret/kubernetes-dashboard-csrf created
secret/kubernetes-dashboard-key-holder created
configmap/kubernetes-dashboard-settings created
role.rbac.authorization.k8s.io/kubernetes-dashboard created
clusterrole.rbac.authorization.k8s.io/kubernetes-dashboard created
rolebinding.rbac.authorization.k8s.io/kubernetes-dashboard created
clusterrolebinding.rbac.authorization.k8s.io/kubernetes-dashboard created
deployment.apps/kubernetes-dashboard created
service/dashboard-metrics-scraper created
deployment.apps/dashboard-metrics-scraper created
secret/microk8s-dashboard-token created

If RBAC is not enabled access the dashboard using the token retrieved with:

microk8s kubectl describe secret -n kube-system microk8s-dashboard-token

Use this token in the https login UI of the kubernetes-dashboard service.

In an RBAC enabled setup (microk8s enable RBAC) you need to create a user with restricted
permissions as shown in:
https://github.com/kubernetes/dashboard/blob/master/docs/user/access-control/creating-sample-user.md
sudo microk8s dashboard-proxy

Checking if Dashboard is running.
Infer repository core for addon dashboard
Waiting for Dashboard to come up.
Trying to get token from microk8s-dashboard-token
Waiting for secret token (attempt 0)
Dashboard will be available at https://127.0.0.1:10443
Use the following token to login:
eyJhbGciOiJSUzI1NiIsImtpZCI6IlNkbEYzN2cwX3BMTlV0cHBCNFFPcGNscEZzYlJLV3Vsem8zSmZHQS1ZUXcifQ.eyJpc3MiOiJrdWJlcm5ldGVzL3NlcnZpY2VhY2NvdW50Iiwia3ViZXJuZXRlcy5pby9zZXJ2aWNlYWNjb3VudC9uYW1lc3BhY2UiOiJrdWJlLXN5c3RlbSIsImt1YmVybmV0ZXMuaW8vc2VydmljZWFjY291bnQvc2VjcmV0Lm5hbWUiOiJtaWNyb2s4cy1kYXNoYm9hcmQtdG9rZW4iLCJrdWJlcm5ldGVzLmlvL3NlcnZpY2VhY2NvdW50L3NlcnZpY2UtYWNjb3VudC5uYW1lIjoiZGVmYXVsdCIsImt1YmVybmV0ZXMuaW8vc2VydmljZWFjY291bnQvc2VydmljZS1hY2NvdW50LnVpZCI6IjlkYTM0NzkwLTg4NmItNDE4Ni05Yzg4LTRlODNiNDY3MmQxYiIsInN1YiI6InN5c3RlbTpzZXJ2aWNlYWNjb3VudDprdWJlLXN5c3RlbTpkZWZhdWx0In0.bkdKoPB9847wC9sjfS1jMakDlr72FU6ZQ90jWUIE43UyvyGrq0QxPms4rZsk6GftJIwh_FqiROq1ZxnR11iz412tZX_uekXe35RHc_1vFLl2DB9Ml2K3a07a5D3F4806TOedcIdsTBmYen94yH6JJmz62Ua9xHZV4rrZXct6M1T8ZLMQizcsTPxT4FHRBDr0YvWD3rrHtPp5I_a0msid1pEgWQpS4jUc3Z7pik4x64F5u925ZbgdbaxbpxSsOY2XFtlY6wrHyhE-wDnEzlcJBhaj7CTExELmRJ2x3UbXdr9w5HeVe18NqEt6lpTM8BCt7P62tD3rhErmtTdzHD3JCQ
Microk8s Dashboard Connection
- 크롬 브라우져 설치하기
sudo apt install net-tools

ifconfig -a
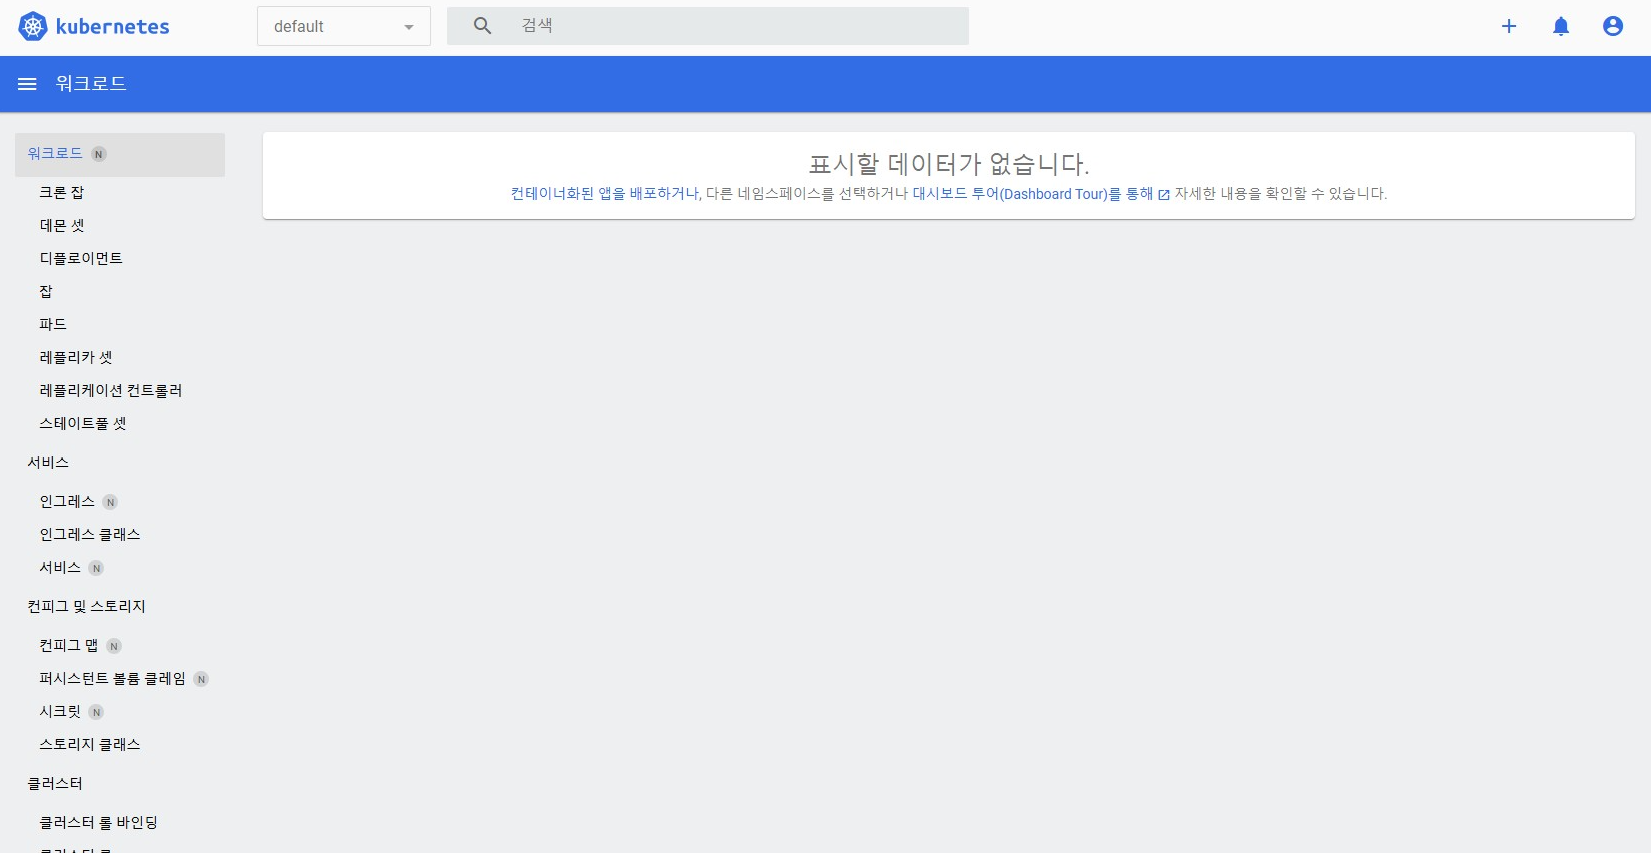
- PC Browser에서 Microk8s Dashboard 접근 (https://)
